What you need to do
To add a new contact within JPA, you will need to:
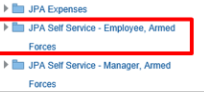
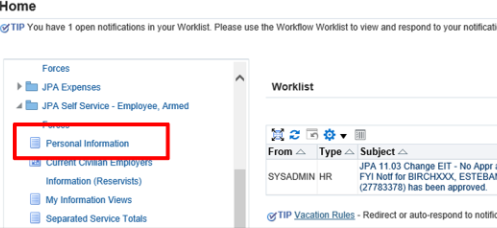
- logon to JPA and select JPA Self-Service Employee, Armed Forces
- select Personal Information
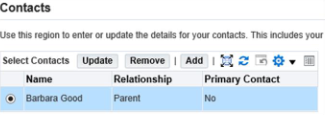
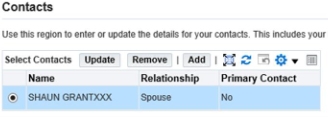
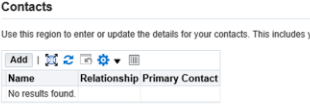
- scroll down to the Contacts section
- this section will contain any records you may have previously added
- click Add
The Dependent and Beneficiary: Create screen will be displayed. In this screen you can enter General Information about your contact such as Name, Relationship etc, and whether they are your Next of Kin (NoK). A Long Tip is present, this will provide you with general advice about who your Legal Next of Kin should be, further information can be obtained from your Unit HR Admin. You will also be able to enter their Main Address and Phone Numbers.
Please Note: Do not use any of the Relationship Fields in the Relationship Drop Down Menu, that start with pensions. To nominate pension contacts use the correct JPA Pension Form.
- enter your details in the fields provided
Additional Nominee is an individual in addition to your Emergency Contact who you wish to be informed in the event of an Emergency.
An additional mandatory field now appears regarding whether you wish this Contact to be provided with communications from the Service Welfare Orgs. An explanatory note regarding this can be found on the Personal Information screen.
The ‘Personal Information: Review’ screen will be displayed.
Check the information thoroughly and ensure it is correct. It is vital that Contact Information is accurate and kept up to date at all times.
NOTE: Do not add a Child Contact that may have previously been recorded in your Contact Details; the details will still be available in your JPA record and can be re-instated by your Unit HR Admin. You are required to inform your Unit HR Admin if you wish to add a child contact as it may affect your entitlement to allowances.

You will be able to see the information you are about to submit. If you realise that you have made a mistake you can click the Back button and make changes. If you do not want to keep the information click the Cancel button.
Click Submit and the 'Confirmation’ screen will be displayed and a message will state that your changes have been applied. When you return to the Personal Information page, the new Contacts will be displayed in the Contacts area.